Menu and Usage
Configuring the Co.S.A. controller is done via the OLED display and the 5-position joystick integrated into the PowerBox. Functions and menu items are continuously evolving to offer maximum control over performance.
Below is the complete list of menu items, derived from the latest firmware update, with explanations on how to use the Joystick.
How to use the joystick
Using the Joystick is intuitive: UP/DOWN to scroll or modify values, RIGHT to enter the submenu, LEFT to cancel/exit, and OK (center press) to confirm.
Main Menu Structure
Below is the list of items as they appear on the display:
- 0. Map edit
- 1. Mapping
- 2. PlotMap
- 3. Ths man
- 4. Ths auto
- 5. Display
- 6. Response
- 7. DragBrk
- 8. BrkMode
- 9. IniForce
- 10. T mode
- 11. EPA
- 12. Voltage
- 13. Ghost
- 14. Run-In
- 15. Firmware
0. Map edit
Delivery maps editor. It allows fine-tuning of custom maps parameters (from 1 to 7) directly via the joystick, changing the slope of the different sections of the response curve.
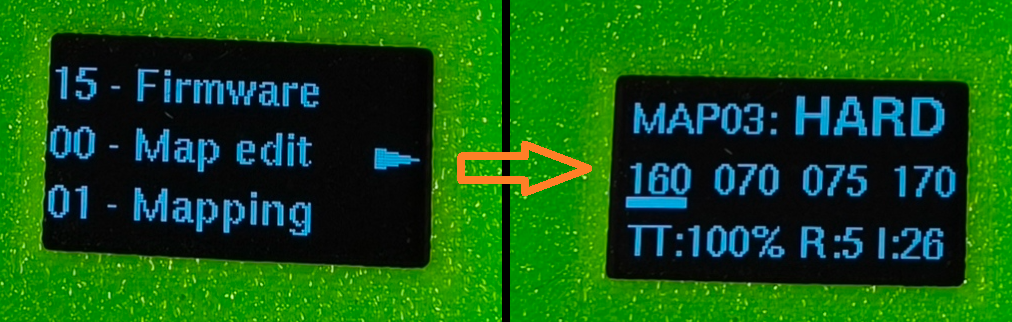
1. Mapping (Extended versions only)
Unlike many other solutions, Co.S.A. allows for real-time mapping. Once a map is selected and you enter this mode, the three potentiometers (Brake, Sens, Tune) change function: they allow you to vary the map on the fly based on driving feel, influencing the first parts of the trigger travel. Note: Mapping mode is highlighted by the orange LED flashing in the handle.
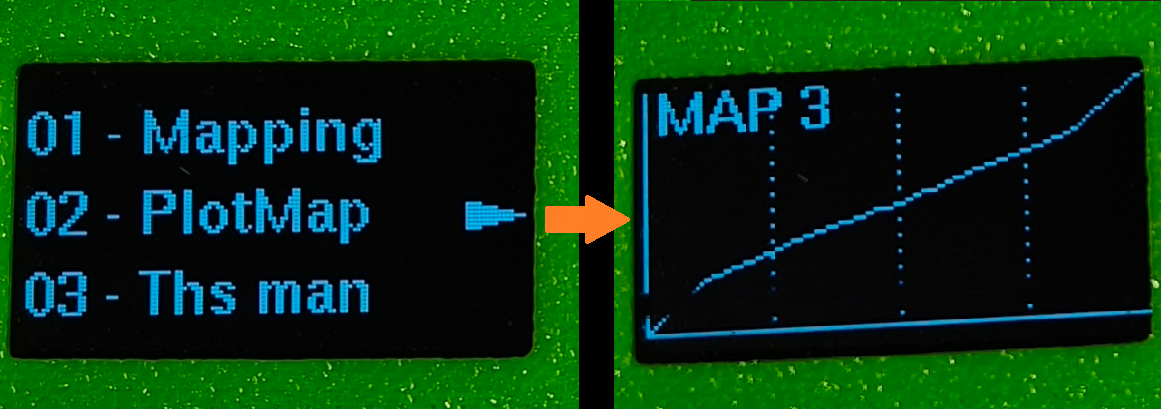
2. PlotMap
Allows you to see the set map trend and the effect potentiometers have on the delivery curve in real time on the display (curve graph). For a correct on-screen trace, the trigger must be moved very slowly.
3. Ths man (Manual Thresholds)
Manual adjustment of the Maximum (100% throttle threshold) and Minimum (brake activation threshold) intervention points. Essential to adapt the controller after mechanical travel adjustments.
4. Ths auto (Automatic Thresholds - Extended only)
Enables self-learning of maximum and minimum points. The system learns the mechanical range limits simply by moving the trigger from zero to maximum repeatedly.
5. Display
Manages the display turning on while driving (YES/NO). The display turning on and updating causes a very slight delay in the calculation loop. For maximum performance (e.g., in a race), it is recommended to set it to NO.
6. Response (Extended only)
Adjusts the system's reactivity on the motor:
| Level | Description |
|---|---|
| 0 - Damped | Very soft and damped response. |
| 1 - Relaxed | Relaxed response. |
| 2 - Standard | Medium response. |
| 3 - Responsive | Reactive response. |
| 4 - Aggressive | Abrupt response. |
| 5 - Extreme | Extreme and immediate response. |
7. DragBrk (Extended only)
Identifies the trigger release speed required for the anticipated brake function (set via the Brake potentiometer) to intervene.
| Level | Intervention |
|---|---|
| 0 - Aggressive | Aggressive intervention, intervenes with almost all release types. |
| 1 - Fast | Fast intervention. |
| 2 - Balanced | Balanced intervention. |
| 3 - Progressive | Progressive intervention. |
| 4 - Smooth | Smooth intervention, requires a quick release. |
| 5 - Filtered | Filtered, intervenes only with a very quick release. |
8. BrkMode
Allows setting the operational braking mode, adapting it to specific track needs or car aerodynamic setup.
NOTE: keep the setting at 0, the function is experimental!
9. IniForce (Initial Force)
Defines the sensitivity base point (initial burst). Varies from 25 to 75 (default is 30%, considered a great compromise). Compared to this base value, the "Sens" potentiometer can add or subtract +-20%.
10. T mode (Tuning Mode)
Specifies the "Tune" potentiometer intervention modes, determining if it should behave as a classic exponential, alter the maximum power cut, or modify other advanced curve dynamics.
11. EPA (End Point Adjustment - Extended only)
Similar to the EPA function on RC transmitters, it limits the maximum power delivery limit to the motor (100% scaled). Useful for training beginners or reducing the model's overall performance.
12. Voltage (Extended only)
Allows measuring and verifying the track power supply voltage on the display. (Optimized precision for 12V).
13. Ghost (Extended only)
Sets a fixed and continuous voltage to the motor. The car "drives itself" at a constant speed. Ideal for mechanical break-in on the track, bench testing, or running track cleaning pads.
Activation sequence:
- Enter the specific menu.
- Press OK on the Joystick.
- Use the brake potentiometer to continue (this action adjusts the speed/delivery to the motor).
14. Run-In (Brake-In - Extended only)
Variant of the Ghost function for intensive break-in of motor and mechanical couplings. The voltage is delivered intermittently.
Activation sequence:
- Enter the specific menu.
- Press OK on the Joystick.
- Use the brake potentiometer to continue (this action adjusts the speed/delivery to the motor).
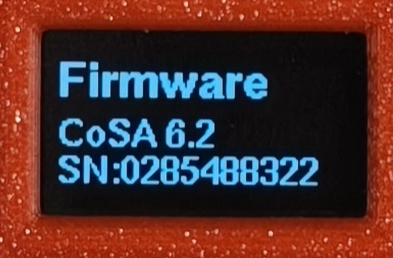
15. Firmware
Displays the current installed firmware version to check for any updates via PC.